The village of Solvang is located in the Santa Ynez Valley, famous for it’s cool climate wines, such as Pinot Noir and Syrah. But Solvang does not follow the local motifs of Spanish Colonial or Cow Town styles. Instead it focuses on it’s Danish heritage. The results are interesting, amusing, and sometimes a bit jarring.
Let’s start with the local Tourist Info building. A whimsical theme is not uncommon in such structures, and this one is certainly attractive. And it sets the theme clearly here: the signs simply says “Solvang, Danish Village”. Got it?

The theme is pervasive throughout the public sections of town, and even the residential neighborhoods tend to follow suit. Here is Atterdag Square. Sounds Danish to me. But I don’t think thats exactly the type of windmill Hans Christian Anderson might have written about…
Here are some solid, well built structures. I bet the fruit and nut trees aren’t in full bloom in Denmark in early February, and that the temperature isn’t in the 80s° (27°-30°C).
Another set of lovely buildings, forming an inviting courtyard. Most courtyards in California look like they are part of a Spanish Mission. This is a nice change.
Hotels of all price ranges go in for the Danish theme in a big way. I suspect the Danish flag is a foot higher than the US flag here… but that might be lens distortion…
First of many windmills, of the European, not Wild West, variety. I’m pretty sure “Charcuterie” isn’t a Danish word, or food, but there is a broader “anything European” theme, that includes a fair amount of Frace, Italy, and Switzerland. I had a sorbetto…
Again, lovely buildings, though the half-timbered effect gets a bit old; and towers; I suspect the tower-to-building ratio is higher in Solvang than anywhere in Denmark!
This is a handsome structure with a bit less kitch. The non-contrasting half timbers are a subtler touch, and the round top dormers.
The Little Mermaid Restaurant… I was waiting for her to make an appearance. I wonder if this is a sushi place?
A typical street lined with typical Faux-Danish buildings. Considering what most such commercial streets in the US look like, its hard to criticize this.
Hamlet is no more real than the Little Mermaid, but this is FantasyLand, so inventions of British Playwrights are allowed.
Santa’s Village! To be fair, if you are running a soft-serve ice-cream shop, in a town that mandates Pseudo-Danish exteriors, this is a clever twist. Twist… did you get that one?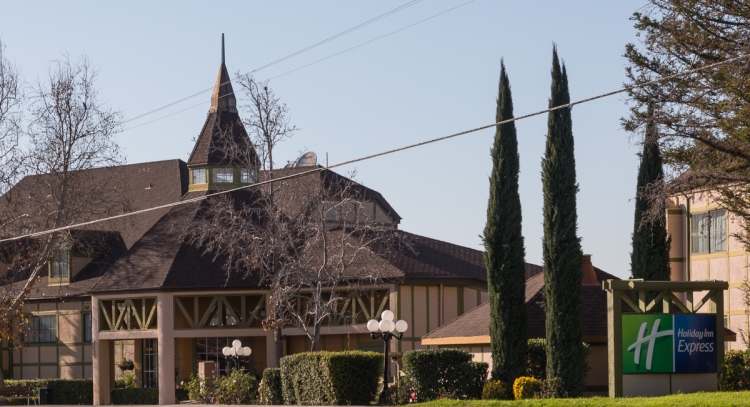
I would have loved to have watched the Holiday Inn Architectural Team reading the design requirements, and attempting to manage some HI Express branding, while going for Danish!

Towers, towers, everywhere. And the more carefully detailed ones are quite lovely.
Solvang, home of the Danish Bopper. The mandated form does clash with the real-world content, sometimes.
And the California climate shows through in places. I’m glad building standards did not require felling these beautiful palms.
And here we have it: the first Viking reference. I was expecting it sooner. Kind of a Cigar Store Indian, with modifications.
Jutland? I’ll buy that. After all Danish and Dutch are really just German with more “Js” right?
Lovely weathervane. Not sure just which children’s story it alludes to. Also of note: the crixes holding down the asphalt architectural “thatching”. But my favorite detail: the stork’s nest. There are a number around town, but this is the most nicely detailed.
Not the Moulin Rouge, but I’ll go along with a windmill on a microbrew pub. Could come in handy for milling all that barley, right?
Some effort was put into the detailing here, from the gunstock timbers on the overhung facade, to the diagonal gable “timbers” to the reverse dutch-sliced roof. Every so often I get a stray whiff of “House of the Seven Gables”.
Mexico gets three dishes, France one, Holland one (if they actually invented Hollandaise sauce) and we’ll allow beer as Danish.
I am unaware of the relationship of Denmark to Romania, but in the European Union, I assume they are welcome to come set up shop…
Even the public restrooms must be in theme! Here they have saved the cost of wooden false half timbers, and just drawn them into the stucco.
Jule Hus. We’ll assume this is like Yule Log, with the Northern love of “Js”. So the Danish/Californian version of that special corner of Hell: The Christmas Tree Shop, where Christmas lasts all year long.
Indeed, look at those poor elves slaving away inside!
I’m not sure what flavor of Father Christmas/Santa Claus/SintaKlaus/ChristmasTroll is used in Denmark, but the double image of these somewhat European-looking Santas, with the somewhat European-looking buildings in the reflection sums things up quite nicely.
Tasteful, and tasty, and they do go out of their way to incorporate European elements into the treats. Marzipan anyone?
If you find this all so charming that you must move here immediately, this is your first stop. The classic clock does blend nicely, though I’ve seen these clocks blend into every historic style in America.

Another tasteful tower, this time with Chinese food!
I must interject that, despite the urban sound of Subway’s name, the Italian (Subway) sandwich was invented in Maine. A fine mix we have here.
Copenhagen Drive-Thru Liquor! Somehow I suspect this is the image that Danes will find most amusing, and will pass around on the internet. Photo credit please!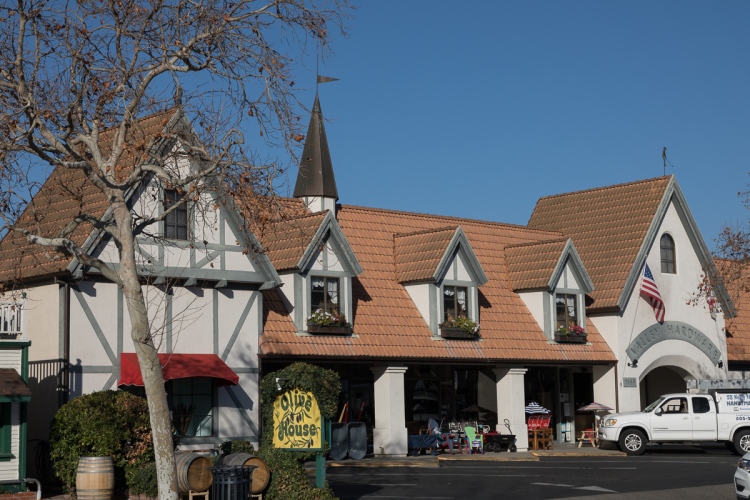
Home of fine Danish Olive Oils. But actually, a few miles up the valley is Los Olivos; this is olive growing heaven. And a hardware store! I love seeing real nuts-and-bolts businesses surviving in touristy downtowns, offering the things residents actually need.
Lots of great detailing here. The bells were chiming while I was there, and it does take me right to Europe to hear them. Why are American bells percussive, while European bells are melodic?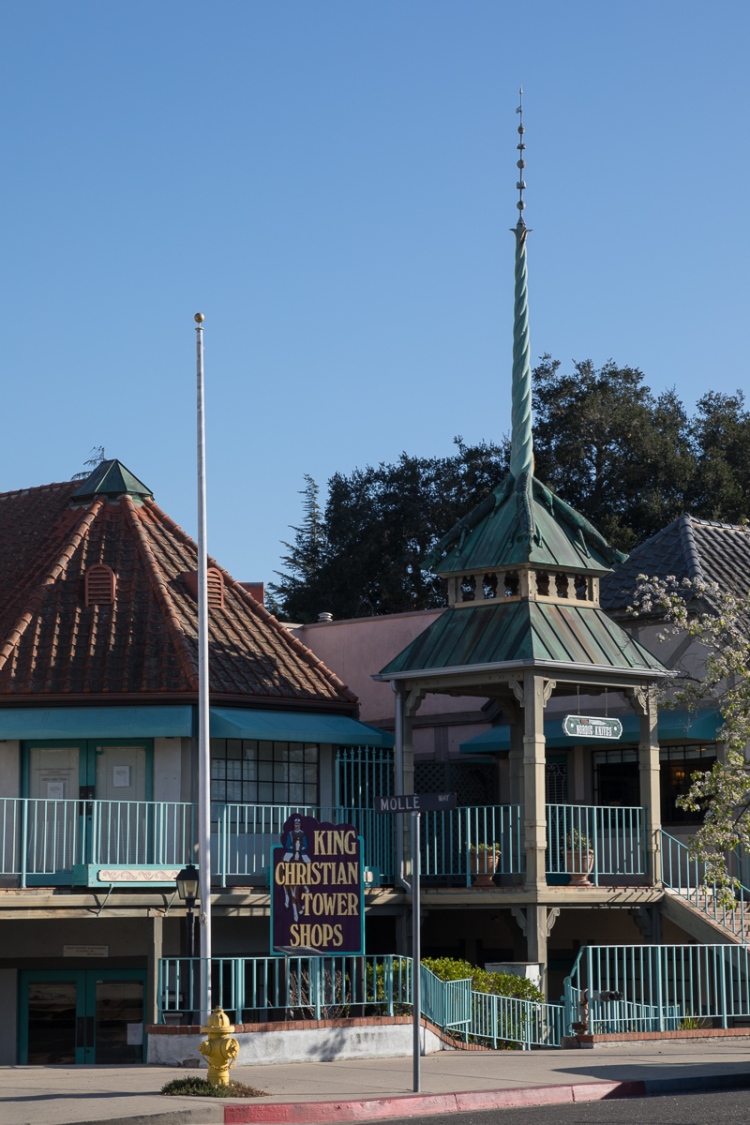
An actual, not mythical Dane is finally referenced!
We’re on a roll, with a second real, if overplayed, Dane.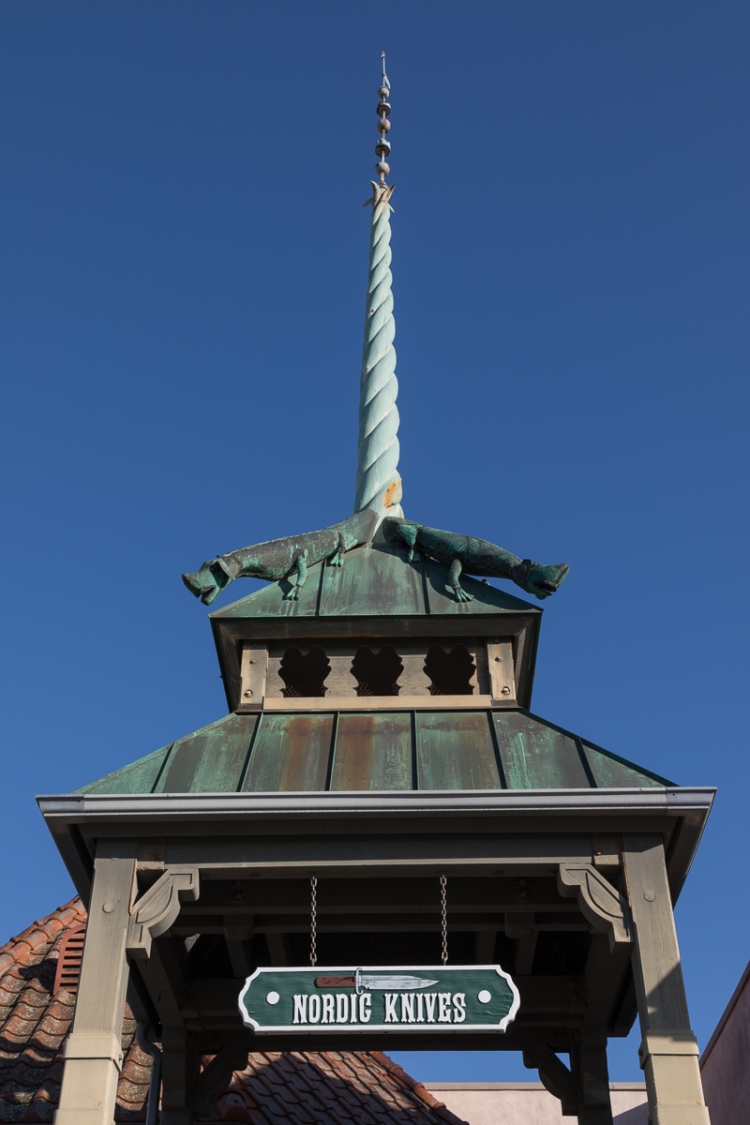
Let’s take Nordic in the broader, Scandinavian meaning, not more stringent, Norwegian meaning. And style points for the great Scandinavian Dragons! And the strong Stave Church references!
More good solid detailing.
Oops… a reference to the Danish Alps, it would appear… or the wider European theme.
And another windmill. This town might be a great place for flying video drones. Right through the holes the windmill blades, if you’re a daredevil flyer.
More Stave Church detailing. And bigger Dutch Slice Roofs.
But California does show through in the foregrounds and backgrounds, in places.
A primer in how to breakdown a blocky three story building into human elements.
And look at the richness of the detailing here. Wow…
It was bound to happen, a shrine to HCA. There were Asian tourists posing while sticking their fingers up his nose, as I waited my turn to shoot the sculpture.

Does this mean Elon Musk is Danish? Or that the Beefeaters vacation in Denmark? Or that the Danes love the Wizard of Oz?
 Free Persimmons
 Pepper Rainbow
 Lichen Tree
 Sleeping Sea Otter
 Antique Shop
 Irish Hills Vista
 Morning Fog
 Holy Mackerel
 The Sun Conducting
 Up In Lights
 Gateway
 Cave Party
 Sea Cave
 Coastal Vista
 Albariño View
 Abalone Ring
 Fount of Light
 Zen Moment
 Egret Scene
 Vineyard Watercolor
 Victorian Beauty
 Palm Tree Illustration
 Across the Heavens, or My Car Roof
 Vineyard Abstract


 I’ve seen a fair amount written about the problems with Apple Powerbook power supply cables wearing at the end near the power supply. I’ve seen various clip-ons or do-it-yourself gummy solutions that claim to reduce this issue.


